7 Steps to Create Onboarding Tours That Boost Retention
Last updated on Wed Jul 22 2026
User onboarding can make or break your SaaS product—and onboarding tours are at the heart of that experience.
Done right, onboarding tours reduce time-to-value, boost feature adoption, and help users feel confident from day one. Done wrong, they frustrate users, increase churn, and waste your team’s efforts.
This in-depth guide walks you through everything you need to know to build effective, scalable, and engaging onboarding tours—whether you’re starting from scratch or looking to optimize what you’ve already got.
What is an onboarding tour?
An onboarding tour is an interactive, guided walkthrough of your product that helps new users learn core features, complete key actions, and understand the value of your app quickly.
Think of it as a personalized concierge service—but built into your interface.
Onboarding tours typically include:
Step-by-step tooltips
Welcome messages
Checklists
Interactive elements
Triggered popups or banners
They can be linear (one step after another) or dynamic (contextual and user-driven).
Why onboarding tours matter
New users don’t want to be dropped into your app and left to fend for themselves. They came to solve a problem—fast. When you follow customer onboarding best practices, onboarding tours make a real difference.
1. Reduce friction for new users
A smooth first-time experience builds confidence. In fact, employees who receive strong onboarding are 2.6x more likely to feel satisfied at work. The same applies to product users—when people know what to do and why it matters, they feel empowered, not overwhelmed. A guided tour helps them skip the guesswork and hit that first “aha” moment faster.
2. Increase product adoption
You’ve built great features, but that doesn’t mean users will find them on their own. Onboarding tours help spotlight your app’s biggest value drivers—especially the ones that aren’t obvious at first glance.
3. Improve retention and reduce churn
First impressions count. 20% of users churn within the first 45 days, but those who have a positive onboarding experience are 69% more likely to stay for 3+ years. A thoughtful tour sets the tone and builds long-term engagement.
4. Scale support without adding headcount
A smart onboarding tour does what a support rep would—answer questions, remove blockers, and guide users through key actions. But it works 24/7, for every new user, without scaling your support costs.
Bottom line? When users feel guided, confident, and successful, they stick around—and that’s great for everyone.
Planning your onboarding tour strategy
Before you start designing tooltips or building onboarding checklists, it’s essential to take a step back and map out your onboarding tour strategy. A thoughtful plan ensures that your onboarding isn’t just a guided product demo, but a journey that drives real user outcomes.
1. Define the core activation moment
The success of your onboarding tour hinges on one thing: getting users to their first win as fast as possible. That moment—often called the activation point—is when a new user finally sees the value your product offers.
Your job is to figure out exactly what that moment is.
It’s not always obvious. For some products, it might be completing a specific action. For others, it might be a series of small milestones. The key is to choose one goal and design everything else around it.
Common activation moments might include:
Sending a message
Uploading a file
Creating a project
Inviting a teammate
Connecting an integration
Publishing content
Don’t assume the activation moment is signing up. That’s just the beginning. The real magic happens once they interact with your product in a meaningful way.
2. Map the minimum path to activation
Once you’ve identified your activation moment, strip everything else away.
New users don’t need to explore every feature on day one. In fact, showing too much too soon can overwhelm them. Instead, lay out the shortest, most direct path from signup to activation—what some call the “minimum onboarding flow.”
Ask yourself:
What steps must a user take to reach value?
What can we postpone or skip entirely in the first session?
Are there any friction points that can be automated or removed?
Be ruthless. Cut anything that doesn’t help the user win right now. You can introduce advanced features, settings, and workflows later—once they’re engaged and invested.
3. Segment your users
One-size-fits-all onboarding is almost always a bad idea. Different users have different goals—and your onboarding should reflect that.
Segmentation allows you to personalize the tour experience based on user type, role, or behavior. Even simple segmentation can dramatically improve relevance and engagement.
Smart ways to segment your users include:
Job title
Company size
Use case
Industry
Signup source
Device type
Plan tier
Geography
For example, a marketer and a developer using the same product may care about entirely different features. If you force them both through the same onboarding tour, one of them is going to check out early.
Use what you know about your users to customize their onboarding flow. That could mean skipping irrelevant steps, changing the copy, or even launching different tours for different roles.
4. Focus on intent over information
It’s easy to fall into the trap of teaching everything about your product up front. But people don’t want a tour—they want results. Great onboarding tours don’t just educate; they help users do the thing they came to do.
Instead of thinking, “What do I need to teach them?” ask, “What are they trying to achieve right now?” Build your onboarding around that intent, and you’ll instantly be more relevant and helpful.
The four types of onboarding tours, and what each looks like in practice
Not all onboarding tours are built the same—and that’s a good thing. The type of tour you use should match your product’s complexity, your users’ goals, and how flexible you want the experience to be. Here’s a breakdown of the four main types, and how they differ from one another:
1. Linear product tours
Linear tours guide users through a fixed, step-by-step sequence. Every user sees the same flow, in the same order. This format works best for straightforward apps or when there’s a single clear activation path you want everyone to follow—like setting up an account or importing data. It’s predictable, easy to build, and gets users from point A to B quickly. The downside? It can feel rigid or irrelevant if the user’s needs don’t match the flow.
A simple SaaS signup flow is a good example. A new user creates a workspace, names their first project, then invites one teammate, in that exact order, every time, regardless of their role. There's no branching logic to build, which is exactly why linear tours suit a single clear activation path best.
2. Interactive walkthroughs
Unlike linear tours, interactive walkthroughs guide users as they take real actions in the product. Think of them as tooltips that appear at the right time, nudging users through tasks like creating their first report or customizing settings. They’re dynamic and responsive, helping users learn by doing rather than watching.
A driven-action tooltip is the clearest version of this in practice. Instead of a tooltip that just displays a message, it waits for the user to actually click the highlighted element before the tour advances. That single change turns a passive read into an active step.
I've talked to enough product marketers to know that a tooltip nobody reads is worse than no tooltip at all. It just adds visual noise. The teams that get this right trigger the tooltip off the user's own behavior instead of the page load event.
"We've been using the Flook beta for a while now for simple tooltips throughout the app and on our pricing page. So simple to use as a non-developer." — Elliott Risby, Co-Founder of Design, Frill
3. Checklist-based onboarding
Checklists offer users more autonomy. Instead of following a forced path, users get a list of suggested actions—like “Upload your logo” or “Invite a teammate”—and can complete them in any order. This format empowers exploration while still providing structure, making it great for multi-use-case products.
Picture a checklist with three to five items: connect your first integration, invite a teammate, publish your first project. Nobody has to complete them in order, which matters because a marketer and a developer using the same tool rarely want the same first action.
In the onboarding flows I've reviewed, checklist-based onboarding tends to outperform linear tours the moment a product serves more than one core use case. A marketer and a developer using the same tool rarely want the same first action, and a checklist lets each of them pick their own starting point instead of sitting through steps that don't apply to them. If you want a deeper walkthrough of building one, our checklist guide covers the setup step by step.
4. Contextual in-app help
This isn’t a tour in the traditional sense. Contextual help surfaces tooltips, banners, or modals based on what the user is doing—or not doing—in real time. It’s perfect for ongoing guidance, subtle nudges, or progressive onboarding after the first session.
Say a user has been active for several sessions but still hasn't connected an integration. A contextual tooltip that only appears at that point lands far better than the same message shown on day one, when it isn't yet relevant to them.
Step-by-step: How to build an onboarding tour
Now let's dive into how to build an onboarding tour.
1. Welcome the user
The welcome experience sets the emotional tone for everything that follows. It's your chance to greet the user, frame their expectations, and create a sense of orientation and belonging. This is especially important in self-serve SaaS products where no human onboarding rep is involved.
At a minimum, your welcome step should do three things:
Greet the user by name or context (if available)
Reinforce the product’s core value proposition
Give them a clear path to start exploring or achieving their goal
A modal or welcome screen is common here, but don’t stop at “Hi, welcome!” Smart product teams use this opportunity to:
Let users choose their own onboarding path (e.g. based on role or goal)
Ask 1–2 lightweight onboarding questions to power segmentation
Share a short explainer video (30–60 seconds max)
Offer a tour opt-in or skip option for returning users
Avoid overwhelming the screen with product info or too many CTA buttons. Think of this as a handshake, not a full presentation.
Also, consider where this screen appears in the journey. Should it show immediately after sign-up, after email verification, or upon the first login? Timing is everything.
Finally, instrument analytics here: track CTA clicks, form inputs, video plays, and skips to refine over time.
A two-question welcome survey works well here: "What brought you here today?" and "How big is your team?" A no-code tool can trigger both immediately after signup with no engineering involvement, and the answers feed straight into the segmentation you set up earlier.
2. Offer to take the tour
Not every user wants or needs a guided tour—especially if they’re returning or already familiar with similar tools. Instead of forcing a walkthrough, offer it as an optional prompt. This could be a modal with “Take the tour” and “Explore on my own” buttons, or a dismissible banner.
Giving users a choice builds trust and shows respect for their time. You can also store their preference and allow them to revisit the tour later via a help widget or resource center.
This flexibility improves engagement and reduces frustration from over-onboarding experienced users.
3. Highlight key features
This is the heart of your onboarding tour—the moment users start interacting with your product’s value. Instead of overwhelming them with everything at once, guide them through essential features step-by-step using UI patterns like onboarding tooltips, modals, and hotspots.
The goal is to help users understand not just what a feature does, but why it matters. Keep each step short, focused, and action-oriented. Avoid walls of text—clarity beats detail in early interactions.
A helpful feature walkthrough typically:
Shows one action per step
Uses plain, benefits-focused language
Ties each feature to a real user goal
Appears only when relevant to the user’s current context
Don’t trigger everything on page load. Instead, use behavioral triggers—such as clicks or hovers—to display tooltips when they’re most helpful. This reduces noise and makes the tour feel like a natural part of the UI rather than an overlay.
It’s also smart to allow flexibility. Let users pause, skip, or revisit parts of the tour without losing progress. A rigid, linear experience might cause frustration or lead to premature drop-off. Remember, great onboarding tours don’t just inform—they empower users to explore with confidence.
Tie this to one specific action instead of a generic feature tour. A tooltip that appears only once a user reaches the upload screen, prompting them to upload their first file, teaches far more than a tooltip that fires the moment the page loads and covers three features at once.
4. Encourage interaction
One of the biggest mistakes in onboarding tours is turning them into passive tutorials. If users are only reading tooltips or watching from the sidelines, they’re not really learning—they’re spectating. To truly engage users, your tour should invite them to do something inside the product, not just look at it.
Instead of walking users through screens, walk them through actions. This builds muscle memory, increases confidence, and shortens the time it takes to reach activation. Every step in the tour should encourage users to click, fill in a field, complete a setup task, or trigger a real outcome.
Some examples of interactive steps:
Filling out a profile
Uploading a file
Creating a project or workspace
Connecting an integration
Sending a message or invite
The key is to break these actions down into small, achievable wins. Don’t just point to a feature—lead users into using it. And avoid blocking them with mandatory steps. Let them skip or return to parts of the tour if they’re not ready.
Also, track each action to measure engagement and drop-off. The more real interaction you get, the more likely users are to stick around and succeed.
Contrast a passive tooltip like "Click here to invite a teammate" with a driven action that waits for the actual click before advancing. The second version is what builds the muscle memory this section already talks about; the first is just a caption.
5. Use visual progress
Progress indicators are simple, but powerful. When users see how far they’ve come—and how close they are to finishing—they’re more likely to stay engaged. Whether it’s a checklist, progress bar, or badge system, visual progress creates a sense of momentum that motivates users to complete onboarding.
Checklists are especially effective because they break onboarding into manageable tasks and allow users to self-direct their flow. Each checked-off item delivers a mini “win,” reinforcing their progress and boosting confidence.
Here are a few effective formats:
A floating onboarding checklist
A step counter in a modal (e.g., “Step 3 of 5”)
Progress bars embedded into a sidebar or header
Make sure your visual progress is both accurate and rewarding. Celebrate completion with a simple success message or animation—small moments of delight go a long way. When users feel like they’re making progress, they’re more likely to keep going.
A floating three-item checklist with a progress bar that fills as each task completes works better than a longer one. Three items keep completion rates higher than seven, because the finish line stays visible from the first click.
6. Layer in contextual help
Not every feature needs to be explained on day one—and forcing it all into the first session can overwhelm users. Instead, layer in contextual help that’s triggered based on user behavior, time, or milestone completions. This approach, often called “progressive onboarding,” gives users guidance exactly when they need it—no sooner, no later.
For example, if a user hasn’t yet invited a team member after creating a project, you can trigger a tooltip or nudge after a day or two. Or if they reach a specific usage milestone—like publishing their first report—you can introduce more advanced functionality in that moment. This keeps the experience personalized, relevant, and unobtrusive.
Contextual help can be delivered through:
Tooltips triggered by clicks or hovers
Slideouts based on inactivity
Banners that appear after specific events
Modals that introduce newly unlocked features
The goal is to match guidance to the user’s stage in their journey. When onboarding flows adapt to real usage patterns, users are more likely to engage, retain information, and build trust in your product. It also reduces support load since users are getting timely answers when they need them most.
7. Ask for feedback
Don’t wait until the end of onboarding to find out what worked—ask users while it’s fresh. After they complete the tour (or even midway), prompt them with a quick thumbs up, star rating, or one-question survey.
Keep it lightweight and frictionless. You’ll gain valuable insights into where users felt confident, where they got stuck, and what you might need to improve. It also sends a clear message: you care about their experience. Bonus points if you act on the feedback and close the loop. The best onboarding flows evolve with user input—not assumptions.
A one-question thumbs up or down prompt right after the last tour step is enough to start. The part teams skip is acting on what comes back, not just collecting it.
What actually makes an onboarding tour effective
Even with the best onboarding tech, it’s easy to miss the mark if your strategy isn’t grounded in real user behavior. For experienced product managers, the challenge isn’t just building onboarding—it’s building onboarding that adapts, delivers value fast, and scales without becoming noise. Here are six best practices that go beyond the basics:
1. Keep it short and focused
Early-stage users don’t care about every corner of your product, they care about solving the problem they signed up for. Guide them to their first win quickly, then get out of the way.
Focus your tour on 1–3 key actions that drive activation. Anything more is overload. Consider layering in deeper education later through progressive onboarding or tooltips triggered by usage milestones.
The stakes here are higher than they look. 74% of potential customers will switch to a competitor if the onboarding process is too complicated.
2. Write clear, benefit-oriented copy
Avoid technical jargon or instructional phrasing. Good onboarding copy speaks to the outcome, not the interface.
Bad: “Click here to configure your settings.”
Better: “Control how your team collaborates.”
Every tooltip, modal, and checklist item should answer: “Why should I care?”
The same shift applies to checklist items. Bad: "Complete your integration setup." Better: "Connect your data so your dashboard stops showing zeros." One tells users what to click. The other tells them why it matters.
3. Offer skip or replay options
Not every user wants hand-holding. Some will want to explore on their own, and that’s fine. Let them skip the tour and revisit it later through a help center, widget, or resource hub.
Better yet, track their actions and intelligently surface help only when it’s needed.
A "Skip for now" link paired with a persistent help-widget icon covers both needs at once. Skipping doesn't mean losing access. The user can relaunch the exact same tour later from that icon whenever they're ready.
4. Personalize the experience
Generic onboarding flows are a fast track to churn. Segment users by role, use case, or plan tier and serve content that’s relevant to them.
A product manager and a sales ops user may need entirely different onboarding paths, even if they’re in the same tool. Use welcome surveys or signup metadata to route users into the right flow.
One SaaS team I worked with ran the exact same onboarding tour for admins and end users for over a year, and support tickets from new admins kept piling up asking where the settings panel had gone. Splitting the tour into two short, role-based paths (one that opened on the settings panel for admins, one that skipped straight to the core workflow for everyone else) cut those tickets noticeably within the first month, without adding a single new feature.
5. Don’t interrupt core tasks
Context is everything. Don’t fire off a modal when someone’s halfway through an action.
Build in logic to detect activity and delay tours until a user is idle or between tasks. The smoother the timing, the more likely users will engage.
Delaying a tooltip until a user goes idle for a few seconds mid-form beats firing it the moment they land on the page. The interruption lands when they're actually pausing, not when they're mid-thought.
6. Measure and optimize
Ship fast—but don’t set it and forget it. Use analytics to track:
Tour start and completion rates
Drop-off points
Time-to-activation
A/B test results
Continuously refine based on real usage, not assumptions. The best onboarding tours are always evolving.
Compare two versions of the same welcome modal, one with a short explainer video, one without, and track which version leads to more users actually reaching the activation action, not just which one gets a higher tour completion rate. Completion and activation aren't the same number, and treating them like they are is how teams miss what's actually working.
"The best thing about Flook is that now the product team have stopped bothering me for tooltips and onboarding tweaks!" — Matt Stone, Co-Founder of Front End Engineering, Juuno
Examples of effective onboarding tours
Check out these inspiring examples and get a head start on your own product onboarding.
1. DesignFiles
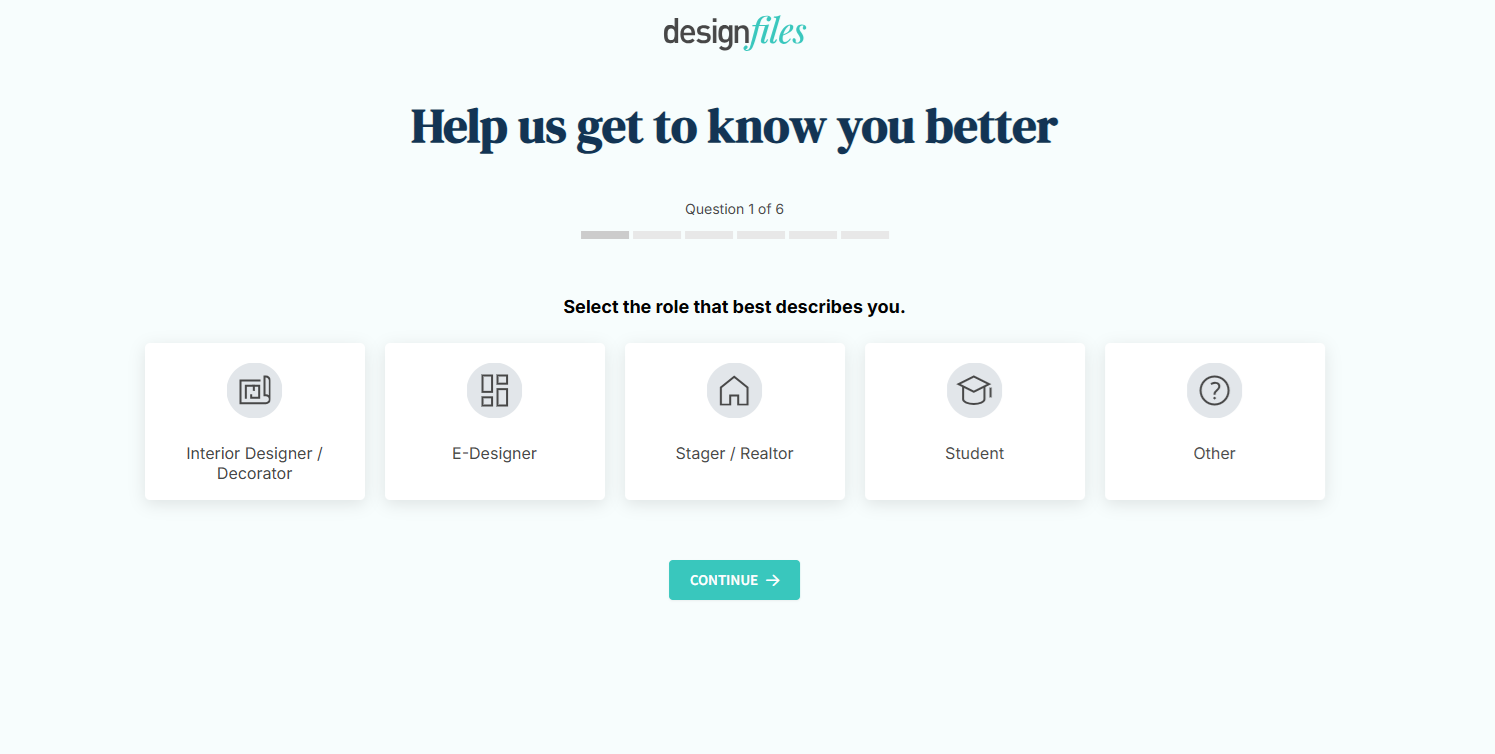
This example from DesignFiles shows how you can combine personalization and flexibility to create a more relevant onboarding experience.
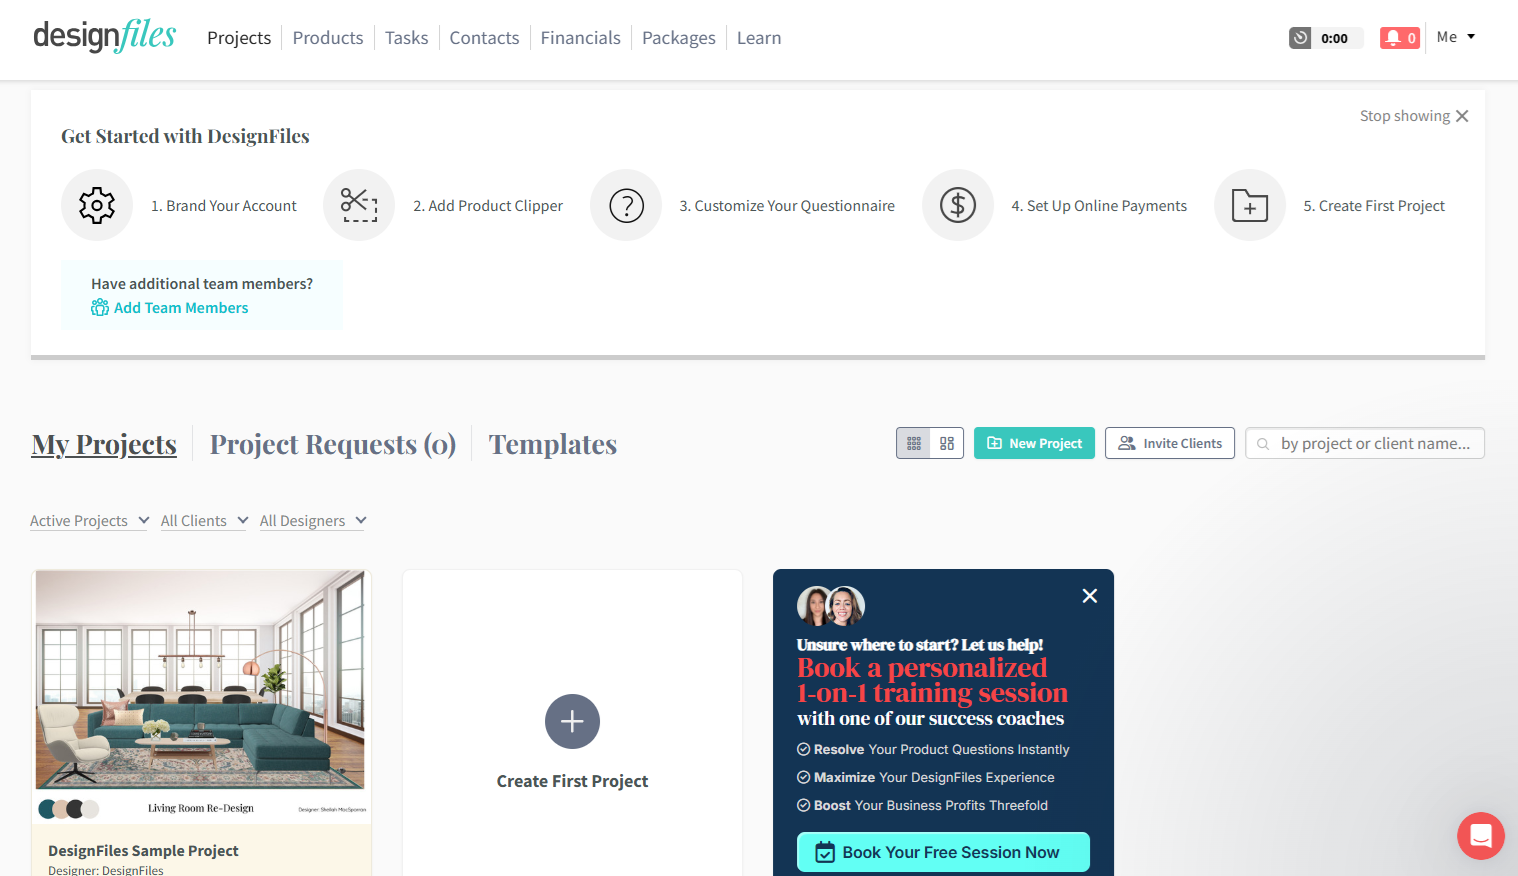
Instead of immediately guiding users through UI elements, DesignFiles begins with a brief survey to learn about the new user: their role (e.g., interior designer, student) and business stage (e.g., 1–2 years, 5+ years). With this context, the platform can tailor the experience to fit each persona’s goals. After the survey, users are shown a simple visual checklist with tasks like “Brand Your Account” and “Set Up Online Payments,” making it easy to get started in the right order.
Why this works:
It captures intent early: Asking just a few multiple-choice questions helps tailor onboarding without friction.
It avoids overwhelming the user: Instead of forcing a linear tour, users see a lightweight, at-a-glance checklist of actions they can complete at their own pace.
It gives autonomy and structure: Users can skip around, complete tasks out of order, or dismiss the checklist entirely.
It supports varied use cases: Whether you're a student or seasoned pro, the experience adapts based on your answers—no one-size-fits-all flow.
Takeaway for product managers:
If your product serves different personas or has a more complex setup, start with a short personalization survey and follow with a non-linear checklist. It’s a user-friendly way to guide action while still respecting user autonomy—and it scales better than a tour that assumes everyone needs the same help.
2. Slack
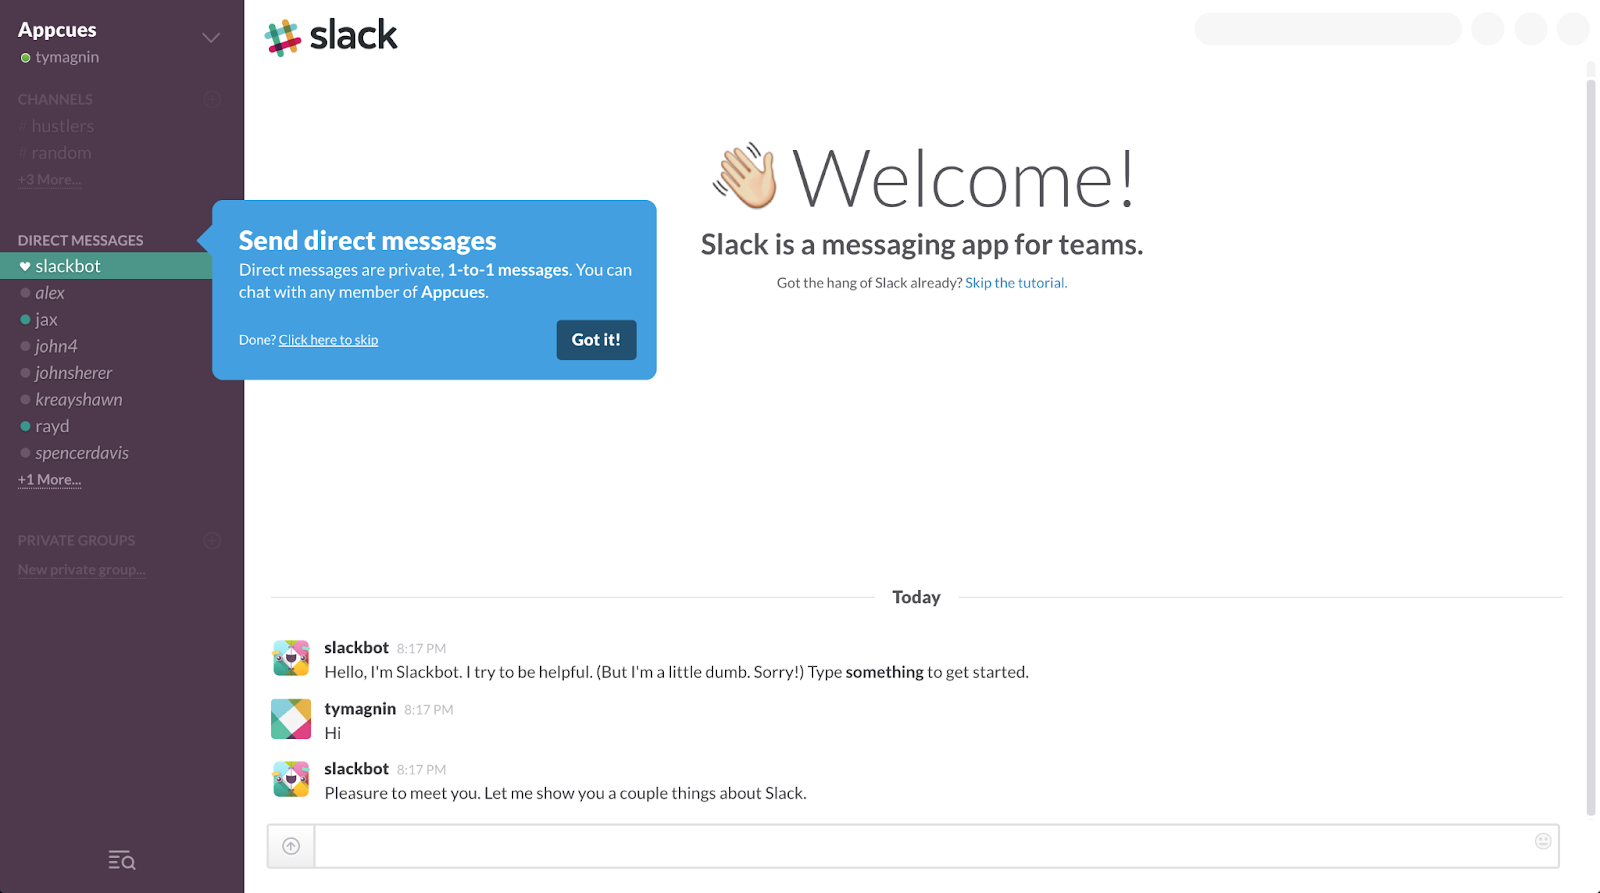
This onboarding example from Slack demonstrates how to guide users through your product’s core value by prompting them to take action right away.Instead of overwhelming new users with an interface tour, Slack gets right to the point: teaching you how to send a direct message. A simple tooltip explains what DMs are and invites you to try it immediately. The Slackbot chat reinforces this by encouraging interaction in a conversational tone. It’s not just telling you what the product does—it’s helping you do it, live.
Why this works:
It’s action-first: Slack’s core utility is messaging, so that’s the first thing new users learn—by doing it.
It uses built-in UI: Slackbot plays a double role as both guide and sandbox, making onboarding feel like using the product.
It’s clear and friendly: The language is casual and approachable, helping reduce friction for first-timers.
It respects user control: Users can skip the tutorial at any time, maintaining autonomy.
Takeaway for product managers:
If your product is action-driven, use onboarding to prompt interaction with real features, not dummy flows or passive tours. Guiding users to complete a meaningful first task (like messaging a teammate) creates instant value and speeds up time-to-activation.
3. Mailchimp
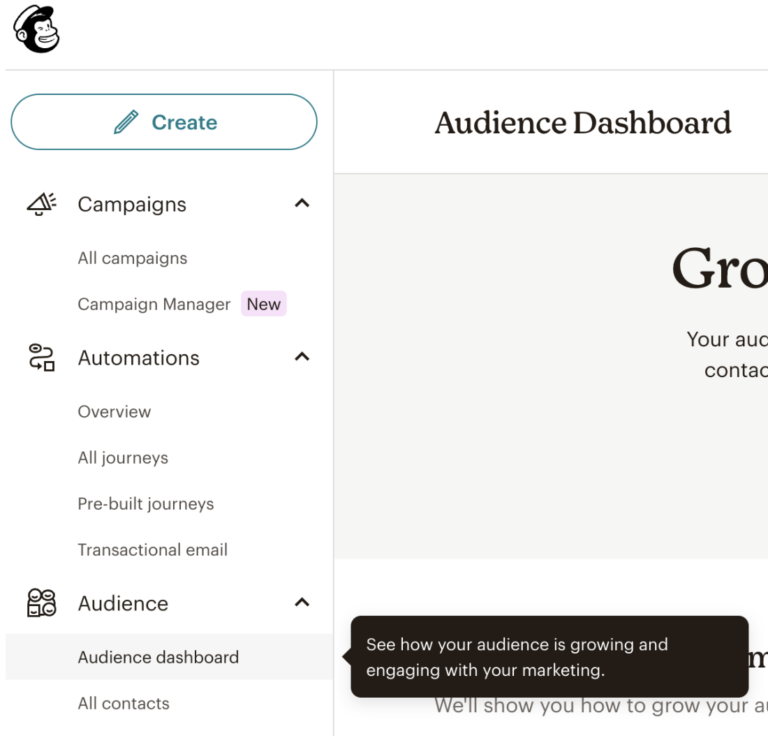
This Mailchimp example shows how a well-placed tooltip can guide users to valuable, often overlooked features—without breaking their workflow.
As users explore the dashboard, a small, subtle tooltip draws attention to the “Audience dashboard” in the sidebar. Instead of overwhelming them with a long tour, Mailchimp uses micro-guidance to show what matters most right now: understanding how your audience is growing and engaging with campaigns.
Why this works:
It’s contextual and non-intrusive: The tooltip appears in-line with the interface, so it feels helpful, not disruptive.
It drives discovery of high-value features: Many users might skip the audience dashboard—this callout ensures they don’t.
It focuses on outcomes, not clicks: The message isn’t “Click this,” but rather “Here’s where you see your audience growth”—a much stronger hook.
It meets users where they are: It doesn’t interrupt with a full-screen modal or pull them away from their current task.
Takeaway for product managers:
Use lightweight, targeted nudges to highlight key features when users need them most. A timely tooltip can boost feature adoption and guide users to value.
4. Snappa
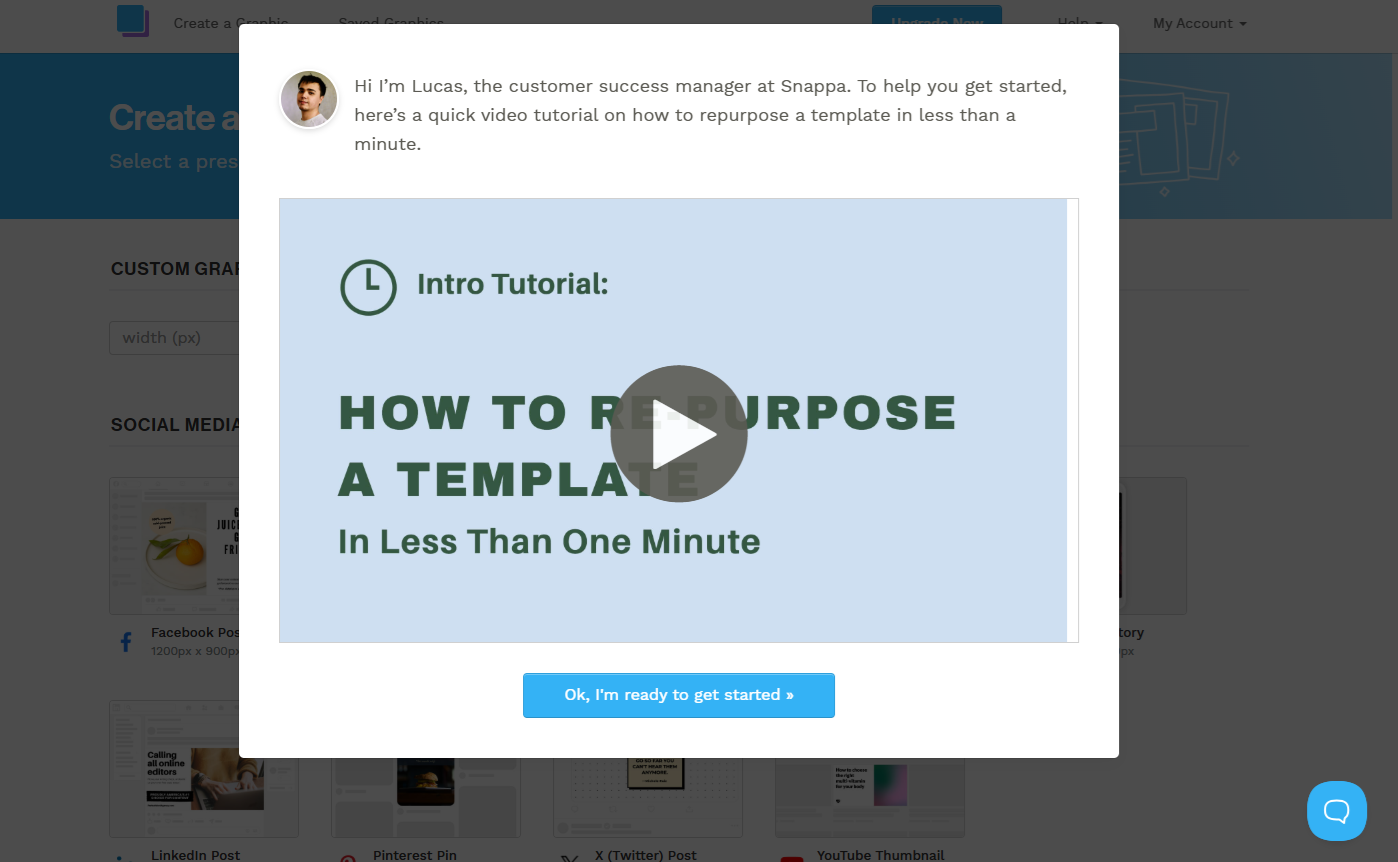
This example from Snappa is a great reminder that not every product needs a full onboarding tour—especially when your product is simple, and your users are just trying to complete a quick task.
Instead of walking new users through multiple steps or UI elements, Snappa presents a short, contextual explainer video right at the start. The message is clear: "You’re here to repurpose a template? Great—watch this 60-second video and you’re good to go."
Why this works:
Snappa’s use case is simple: Most users just want to create or edit a design fast. A long tour would slow them down.
It respects user intent: The video is optional and skippable, offered as quick support—not a forced walkthrough.
It’s human and personal: Featuring a real person (Lucas, the customer success manager) adds a friendly tone and builds trust.
It sets users up for success immediately: In under a minute, users learn how to get value from the product.
Takeaway for product managers:
If your product has a focused use case and low learning curve, a single high-quality video might do the job better than a tooltip-based tour. Sometimes, less onboarding is more, especially when speed and clarity are what users care about most.
Common mistakes to avoid
Even experienced teams can fall into traps when building onboarding tours. Avoiding these common missteps will save you time, prevent user frustration, and help your onboarding scale as your product grows.
Here are key mistakes to watch out for:
Overloading the first session with too much info: Users don’t need to learn everything on day one. Cramming too many steps or features into the initial experience can overwhelm and cause drop-off. Focus on the essentials first, then introduce more as they explore.
Using technical or unclear language: Tooltips filled with jargon or vague instructions won’t help anyone. Use plain, benefit-driven language that focuses on outcomes, not system behavior. Speak like a helpful guide, not a product manual.
Making tours mandatory without opt-out: Forced onboarding feels like friction. Let users skip or exit the tour and rejoin later if needed. Providing options builds trust and respects their experience level.
Interrupting critical workflows: Timing matters. Don’t show tooltips or modals when a user is mid-task, especially during actions like data entry or checkout. Wait for moments of pause to surface help.
Not updating the tour as the product evolves: If your onboarding still references old features or outdated UI, you’re eroding trust. Treat tours as living assets that should be reviewed regularly.
Ignoring mobile or accessibility needs: If your onboarding tour isn’t optimized for mobile users or screen readers, you’re losing a chunk of your audience. Build inclusively from the start to support all user types.
Tools to build onboarding tours
These are some of the top tools for building onboarding tours for web, mobile, and desktop apps.
1. Flook
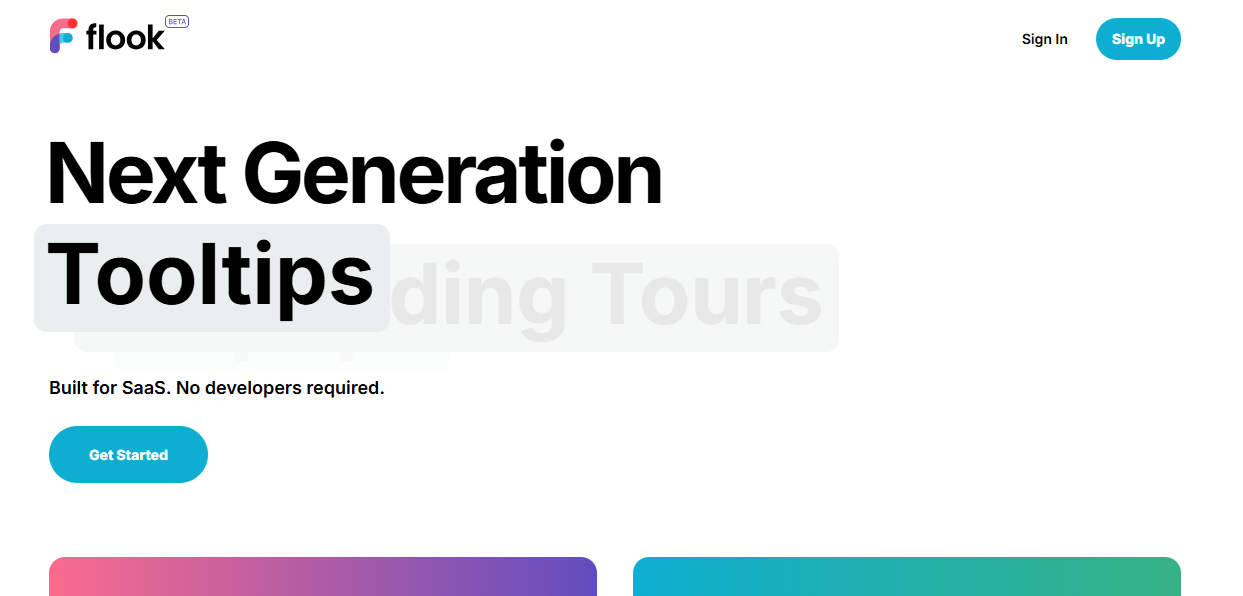
Flook is a lightweight, no-code platform built for fast, flexible onboarding—perfect for startups, internal tools, or SaaS teams that want to ship without waiting on developers. Everything is built via a Chrome extension, so you can create and launch onboarding flows in minutes.
Top features:
Tooltips
Onboarding tours
Popups
Banners
Checklists
Slideouts
Pricing:
Flook is currently in beta with a one-time $49 lifetime deal. No subscriptions, no usage limits—just one payment for full access.
2. Chameleon
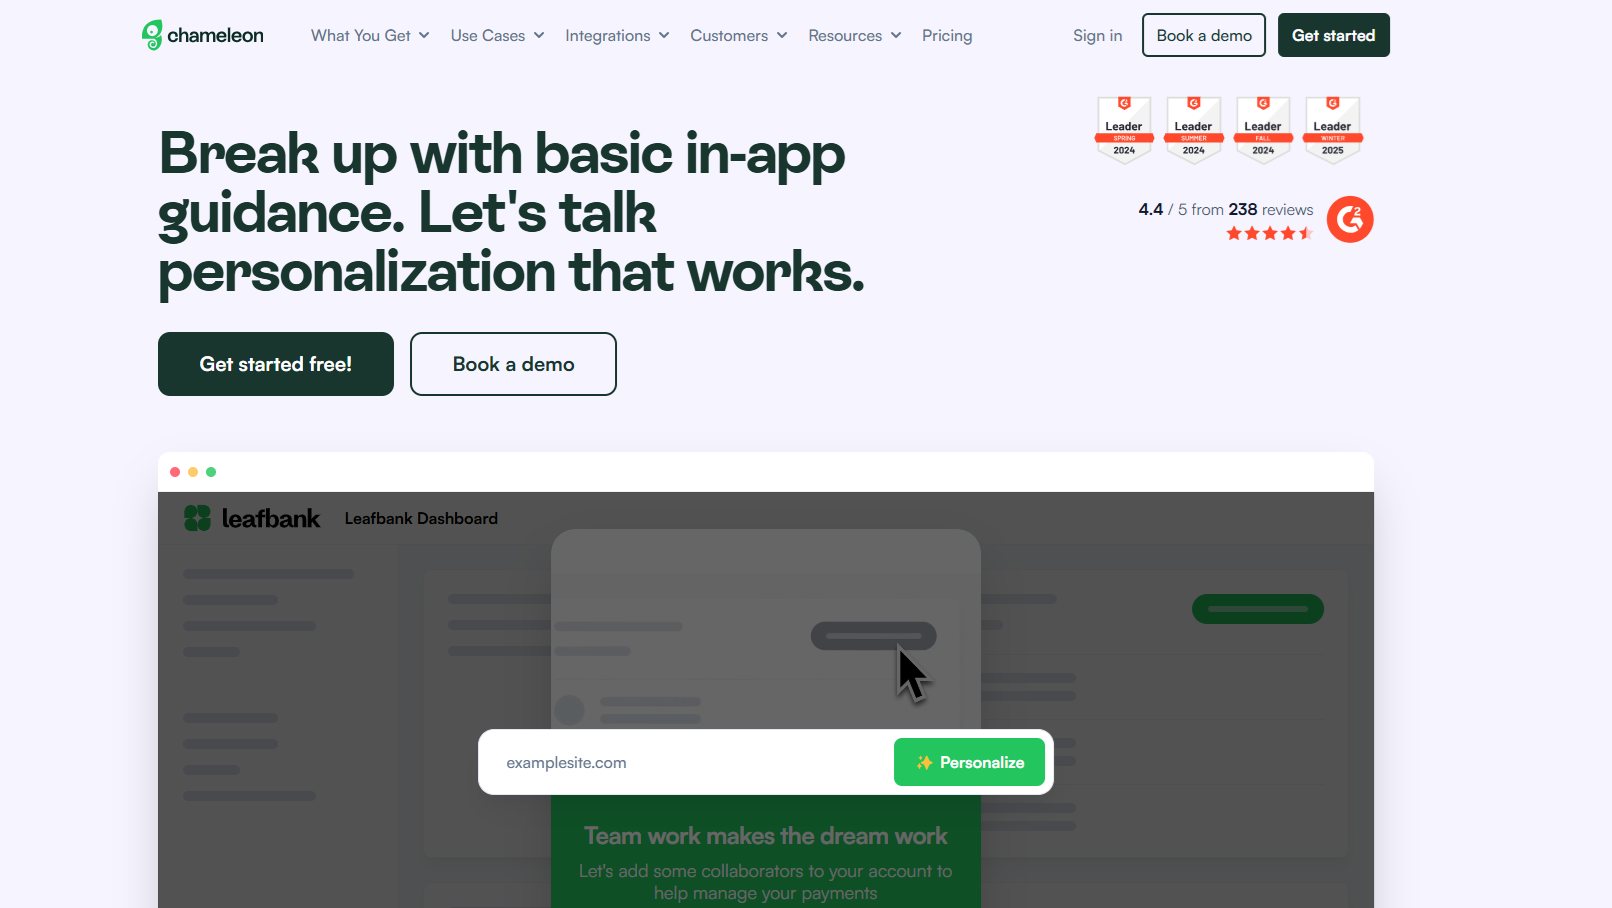
Chameleon is a modern, no-code digital adoption platform built for SaaS teams that want full control over onboarding, feature education, and in-app engagement. With smart targeting, dynamic segmentation, and AI-assisted flows, Chameleon helps create personalized user journeys that drive activation and retention.
Top features:
AI-generated tours & demos
Interactive product tours
Onboarding checklists
In-line banners & nudges
A/B testing & performance goals
Smart segmentation & targeting
Pricing:
Chameleon uses a usage-based model tied to Monthly Tracked Users (MTUs). There’s a Free plan with unlimited interactive demos. Paid plans start at $279/month (Startup), while the Growth plan begins at $12,000/year and unlocks advanced features like A/B testing and unlimited tours. Enterprise pricing is available for teams needing robust customization and security.
3. Appcues
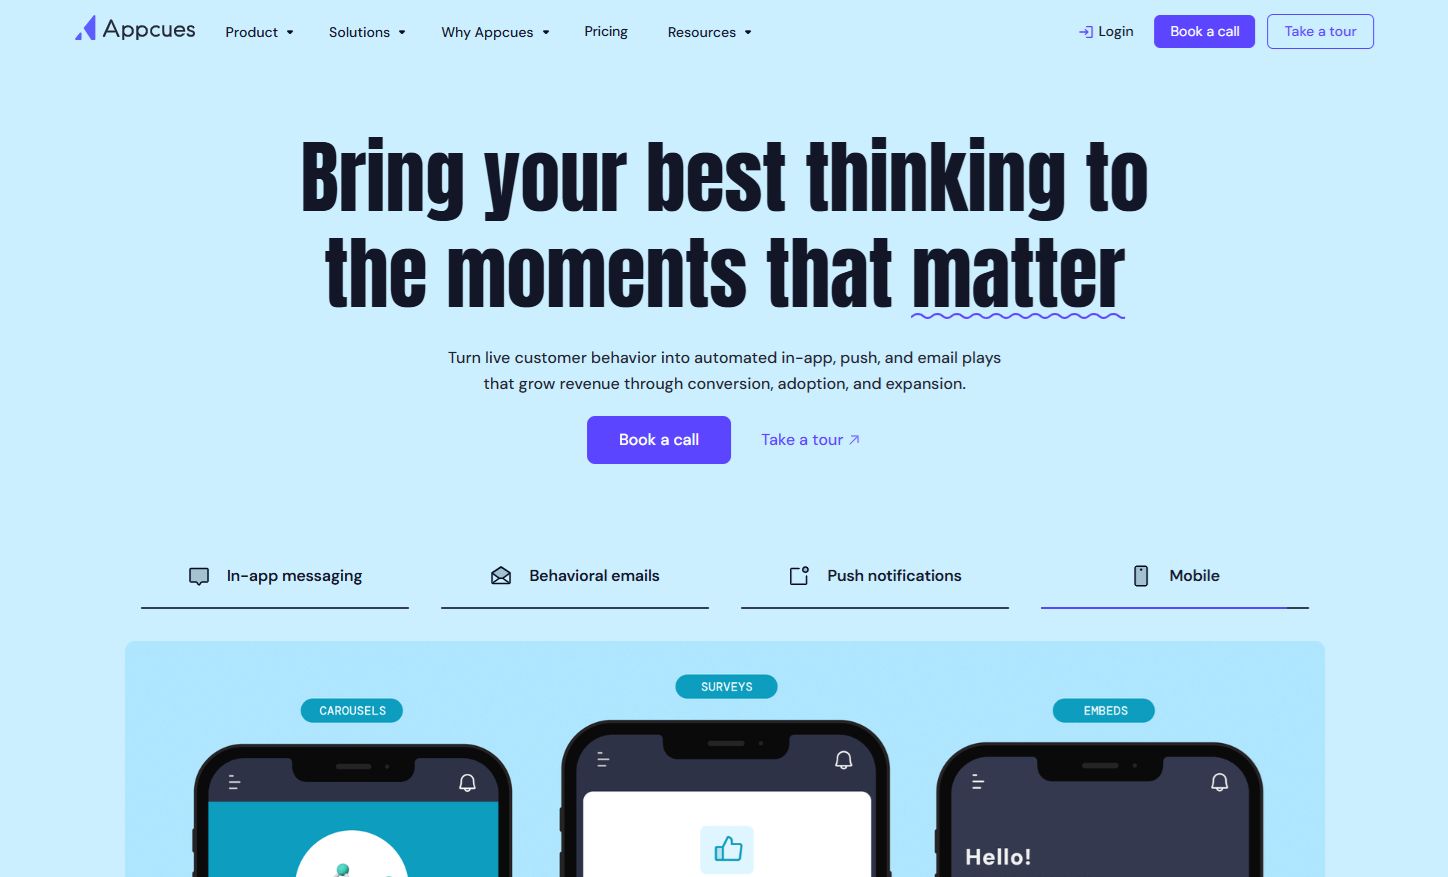
Appcues is a product-led growth platform built for SaaS teams that want to drive adoption, feature engagement, and retention—without relying on engineers. It offers a polished, no-code experience builder for onboarding flows, tooltips, checklists, and announcements across both web and mobile platforms.
Top features:
No-code onboarding flows, tooltips, checklists, and banners
In-app, email, and push notification campaigns
Behavior- and attribute-based targeting
A/B testing, goal tracking, and reporting
Resource Center, NPS surveys, and user feedback tools
Integrations with Salesforce, Segment, HubSpot, and more
Pricing:
Appcues uses Monthly Active Users (MAUs) to determine pricing. The Start plan begins at $300/month and includes up to 5 users and 50+ experiences. The Grow plan starts at $750/month and adds premium features like NPS, advanced targeting, and more users. Enterprise plans are fully customizable, with support for SAML SSO, custom roles, and enhanced security.
4. Pendo
Pendo is a comprehensive platform that combines product analytics, in-app onboarding, and user feedback to help teams improve software adoption and experience—across both customer-facing products and internal tools. With no-code guides, AI-powered insights, and deep behavioral tracking, it’s ideal for enterprise teams managing large-scale onboarding and digital transformation.
Top features:
No-code onboarding tours and in-app guides
Advanced product analytics and behavioral trends
AI-powered insights and automation
Session replay for user behavior analysis
In-app and email NPS & feedback tools
Journey orchestration and roadmap validation
Pricing:
Pendo uses usage-based pricing across four tiers: Base, Core, Pulse, and Ultimate. Each tier unlocks more features, from analytics to session replay and AI-driven personalization. A Free plan is available for up to 500 Monthly Active Users, including core analytics, basic guides, and NPS surveys—making it a strong entry point for smaller teams.
5. Intro.js

Intro.js is a lightweight, open-source JavaScript library for building custom onboarding tours and product walkthroughs. Built for developer-led teams, it offers complete control over styling, logic, and behavior—without adding heavy dependencies or bloat.
Top features:
Step-by-step onboarding tours
Lightweight (10kB) with no dependencies
Fully customizable step options
Open-source (AGPL license)
Easy integration via CDN or NPM
Supports SPAs, static pages, and scrollable elements
Pricing:
Intro.js is free for open-source and non-commercial projects. Commercial lifetime licenses start at $9.99 for a single project. The Business plan ($49.99) covers up to 5 projects, and the Premium plan ($299.99) includes unlimited projects with priority support. All plans are one-time payments.
Measuring success: Key onboarding metrics
Building a solid onboarding tour is only half the job—measuring its effectiveness is what tells you if it’s actually working. Without data, you’re flying blind. The right KPIs can reveal whether users are engaging, reaching value quickly, and sticking around long enough to convert or become power users.
Here are the key onboarding metrics to track:
Activation rate: The percentage of users who complete your defined activation action (e.g., publishing a dashboard, sending an invite). This is your core signal that onboarding is working.
Time to value (TTV): How long it takes a user to hit their first “aha” moment. The shorter this is, the better. A long TTV usually means friction.
Tour completion rate: The percentage of users who finish your onboarding tour. Low completion may suggest too many steps, poor timing, or irrelevant content.
Feature adoption: Tracks how often users interact with your core features post-onboarding. A great tour should lead to increased usage of high-value functionality.
Retention rate: Measures how many users return after 1, 7, and 30 days. If onboarding is effective, you’ll see higher retention during these early stages.
Frequently asked questions
Get answers to top FAQs.
What’s the goal of an onboarding tour?
The primary goal of an onboarding tour is to help new users quickly understand and experience the value of your product with minimal friction. It’s not about showing every feature; it’s about guiding users to that “aha” moment where your product solves a real problem for them. A great onboarding tour reduces time to value, builds confidence, and drives early engagement. For product managers, it’s also a key tool to shape first impressions, improve activation metrics, and scale user education without adding support overhead.
Should every product have a tour?
Not necessarily, but most should. For very simple tools or highly niche, technical products with a small, expert user base, a tour might be overkill. However, if your product has multiple use cases, a non-intuitive UI, or a longer learning curve, a well-structured onboarding tour is one of the most effective ways to reduce drop-off. The more complex the product or diverse the audience, the more value a tailored onboarding flow can provide.
Are onboarding tours better than docs?
They’re complementary, not competing. Documentation is great for in-depth reference and self-service support, especially for advanced or niche use cases. Onboarding tours, on the other hand, are about showing users what to do in context and in real time. They help users take action, not just understand concepts. A great product experience typically blends both: interactive tours for early-stage guidance and docs for long-term discovery and troubleshooting.
Can I build onboarding tours without coding?
Absolutely. No-code platforms like Flook, Appcues, Chameleon, and UserGuiding allow product and growth teams to build onboarding experiences using drag-and-drop builders or browser extensions. These tools support tooltips, modals, checklists, and targeting logic, all without engineering involvement. For teams with limited dev resources, no-code onboarding is a fast and flexible way to ship and iterate.
How often should I update my onboarding tour?
Your onboarding tour should evolve alongside your product. Update it any time your UI changes, key features shift, or user behavior reveals friction. At a minimum, revisit your tours quarterly to ensure alignment with your current product goals. If you’re shipping fast, consider lightweight A/B testing or feedback loops to continuously refine the experience. Stale onboarding is worse than no onboarding. It creates confusion, misalignment, and erodes trust.
Onboarding tours are essential for driving activation, adoption, and long-term retention. If you want to build and launch powerful, no-code tours in minutes, give Flook a try.